How To Add Your Website To Cloudflare
Table of Contents
What is Cloudflare
Cloudflare is a content delivery network (CDN) and web application firewall (WAF) service. It sits between a website’s server and end users, acting as a reverse proxy. Some of the main benefits Cloudflare can provide include:
- Performance and Speed – Cloudflare caches static content and serves it from data centers closer to users. This speeds up load times by reducing the distance content has to travel.
- DDoS Protection – Cloudflare filters malicious traffic and absorbs DDoS attacks, so the origin server stays online. This helps mitigate downtime from DDoS attacks.
- Web Application Firewall – Cloudflare can block common web exploits, bots, and other threats that may target vulnerabilities in site code. This acts as an extra security layer.
- Reliability – Cloudflare’s global network provides built-in failover and redundancy if an origin server goes down. This improves uptime and reliability.
- Analytics – Cloudflare provides analytics on visitors, traffic sources, performance metrics, and more. This gives insights into how end users experience a website.
- Ease of Use – Cloudflare works by just changing a site’s DNS settings to point to Cloudflare’s services. This makes set-up and integration easy, without needing to change web server configuration.
Adding your site to Cloudflare
1. Go to Cloudflare’s website and click “Sign Up”:

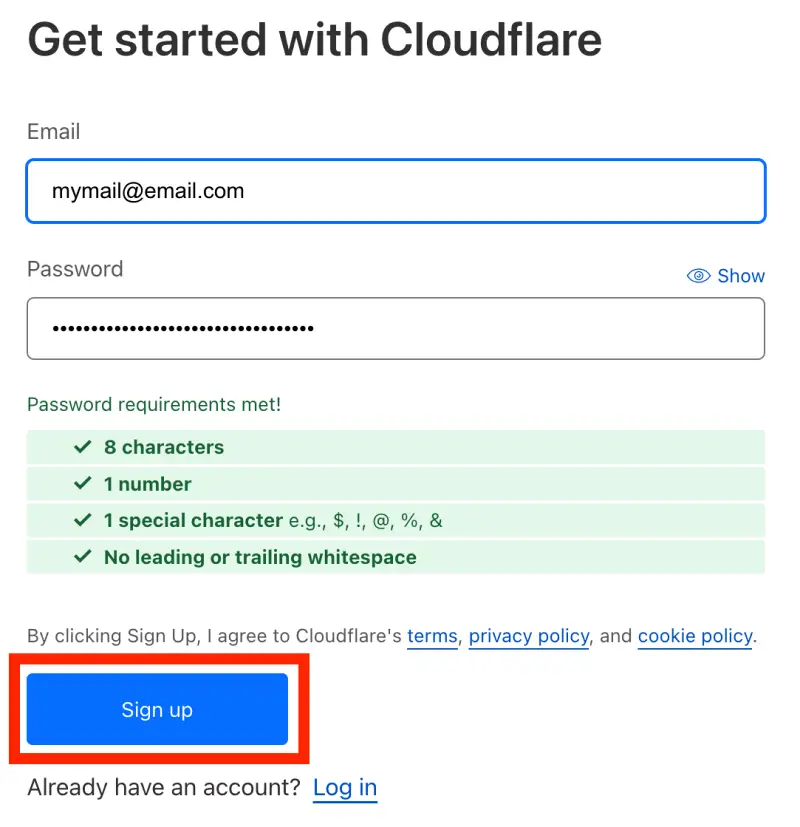
2. Fill in your email address and password and click “Sign Up”:

3. Next, click on “Add website or application”:

4. Fill in your domain name and click “Continue”:

5. Now it’s time to choose your plan. For the purposes of this tutorial, a free plan is sufficient. Scroll down to the bottom of the screen and select the “Free” plan, then click “Continue”:

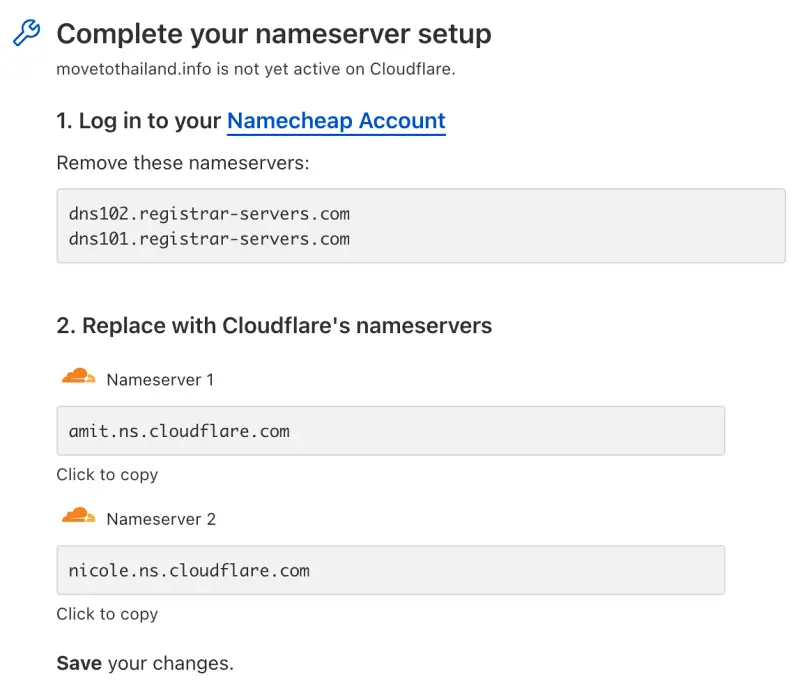
6. This part is the most technical of the setup. For Cloudflare to work, it needs to handle your DNS records. This means you must change the DNS servers for your domain to Cloudflare’s.
You need to log into your account at your domain registrar (where you bought your domain) and change the DNS servers there. This could be GoDaddy, Namecheap and many others.

7. Finally, you can check if the control of your domain has been transferred to Cloudflare by clicking on “Check nameservers”. The transfer can take up to 24 hours, but usually takes less than 30 mins. You should also receive an email from Cloudflare when the transfer is complete.

Testing to see if Cloudflare is enabled
Follow the below steps to check your Cloudflare is working on your website.
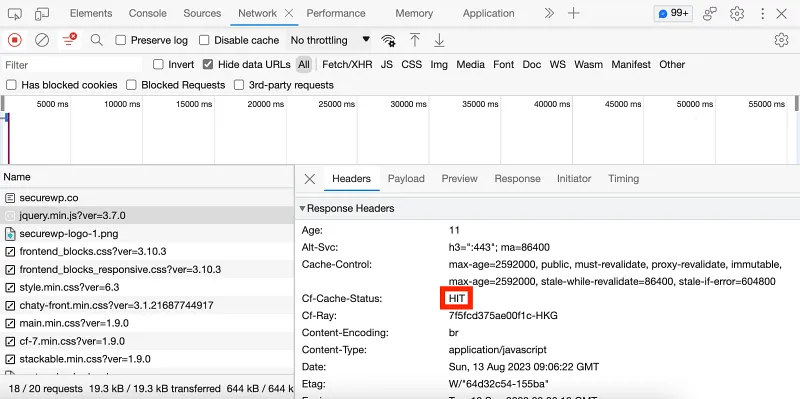
- Load up your website in Chrome or Edge.
- Right-click on the site and click on Inspect.
- Now, click on the Network tab.
- Click on any JS or CSS file from the left corner.
- If your cf-cache-status shows HIT, Cloudflare is working fine.

Need help setting up Cloudflare?
I understand if you’re busy or don’t want the hassle of setting up and configuring Cloudflare. No problem, just reach out to me and I’ll do it for you.
